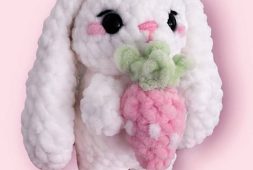
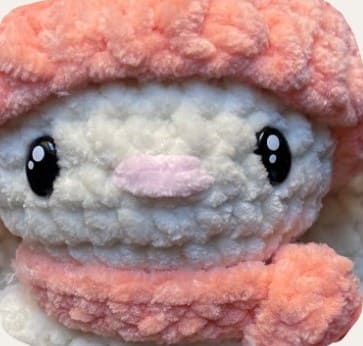
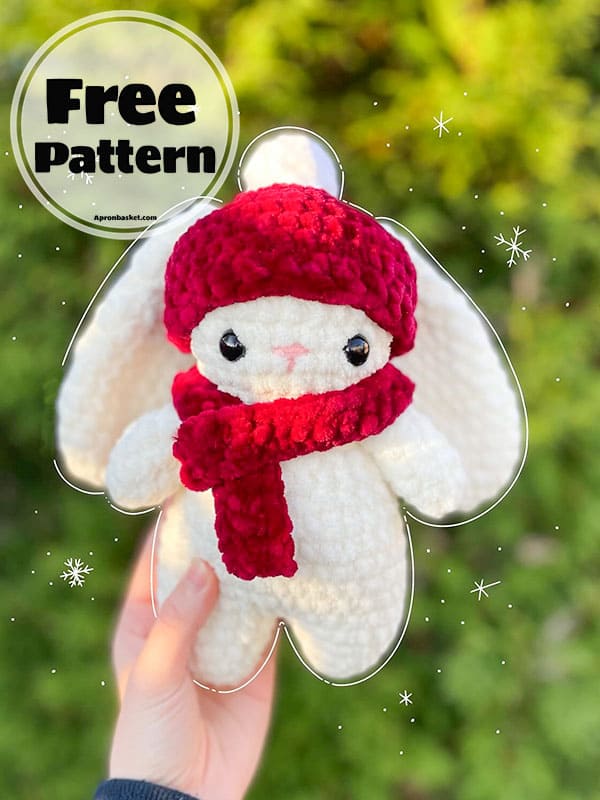
Today, I continue to bring you wonderful free amigurumi patterns. Now here is the free crochet bunny pattern. It is a beginner-level amigurumi bunny. You can prepare this cute plush bunny thanks to the step by step amigurumi bunny crochet pattern instruction. Your children will love the softness of its texture. For this reason, I think it would be better to make it from a plush yarn. You will also get a larger bunny. You will also learn how to make a hat and scarf to decorate your crochet bunny pattern. Yes, the free instructions include these accessories too. You can use these accessories in any colors you want. I can’t wait for you to share your wonderful colorful bunny toys with me.
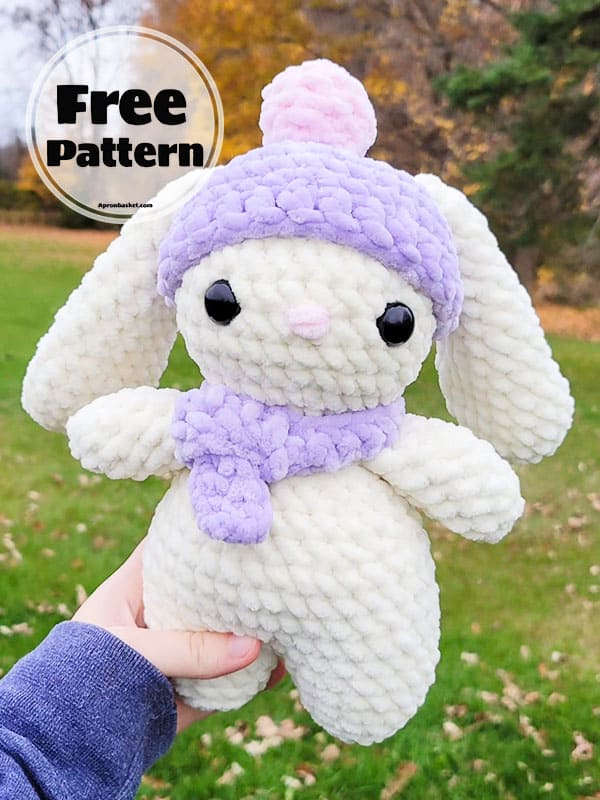
Winter Crochet Bunny Pattern
Designers:
all_the_right_knots7
cozyandbare
Materials
Chunky yarn.
Crochet hook 4.5 mm / 5 mm.
Scissors.
Stitch marker.
Stuffing.
Safety eyes.
Darning needle.
Abbreviations
mr- magic ring
sc- single crochet
inc- increase
dec- decrease
blo- back loop only
st- stitch
ch- chain
Notes:
This pattern is worked from the feet all the way to the head.
The arms are single crocheted into the body.
You will have to sew on the ears and tail.
The scarf + hat is removable, so feel free to make different colored accessories.
The arms will be worked into the body you begin the head.
Arms (make 2)
Rnd 1. sc 4 in MR
Rnd 2. inc around (8)
Rnd 3-7. sc 8 (8) *5 rounds*
Stuff arms and sc 4 across the top to close the arm.
Tail
Rnd 1. sc 4 in MR (4)
Rnd 2. inc x8 (8)
Rnd 3. sc around (8)
Lightly stuff.
Rnd 4. dec x4 (4)
Fasten off and leave tail.

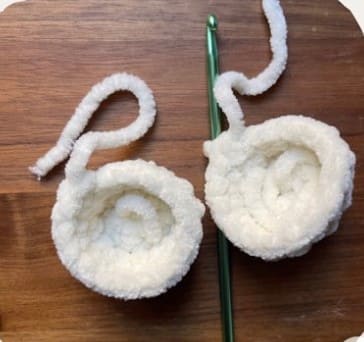
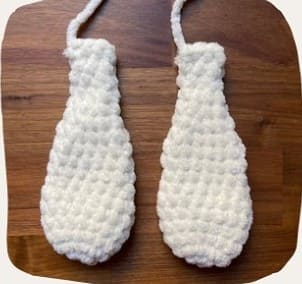
Feet
Make 2.
Rnd 1. sc 6 in magic ring (6)
Rnd 2. inc around (12)
Rnd 3. BLO sc 12 (12)
Rnd 4. (sc2,inc)x4 (16)
Rnd 5. sc 16 (16)
Fasten off first leg, leaving medium tail. Close small gap between legs if you have one with this tail, after finishing legs.
Make second leg, but don’t fasten off.
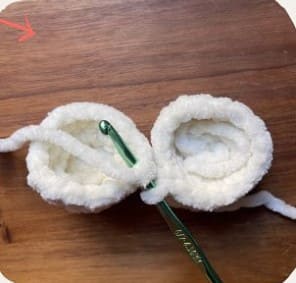
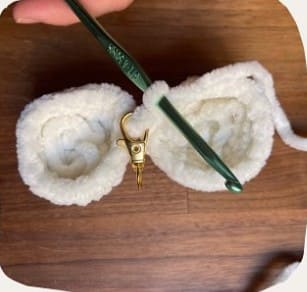
Connecting the feet to make the legs:
To connect the feet, you will take your second foot that you didn’t fasten off, and sc into the last stitch on the first foot.
This will count as your first stitch of this round, so make sure to place your stitch marker here.
Rnd 1. sc 1 into the first leg, sc 15 around the leg, then sc 16 around the second leg (32)
Rnd 2. sc 32 (32)
Rnd 3. inc, sc 15, inc, sc 15 (34)
Rnd 4. sc 34 (34)
Rnd 5. sc 8, dec, sc 15, dec, sc 7 (32)
Rnd 6. sc 32 (32)
Rnd 7. (sc 2,dec)x8 (24)
Rnd 8. sc 24 (24)
Rnd 9. (sc 4,dec)x4 (20)
Stuff legs + body, keep stuffing as you work the last few rounds.
Rnd 10. (sc 3,dec)x4 (16)
Rnd 11. 4 sc, attach arm with 4 sc, 4 sc, attach second arm with 4 sc. (16)
Rnd 12. (sc 2,dec)x4 (12)
Don’t fasten off, you will continue on to the head now.
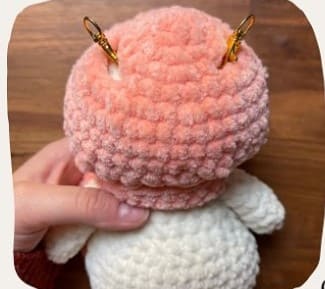
Head
Rnd 13. inc x12 (24)
Rnd 14. (sc 3, inc)x6 (30)
Rnd 15-19. sc 30 *5 rounds*
Rnd 20. (sc 3, dec)x6 (24)
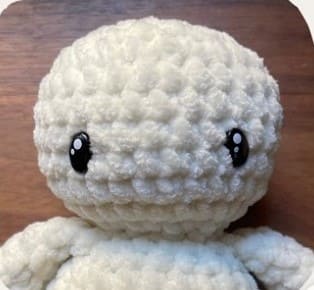
If using safety eyes, place between rounds 17 and 18 about 5-7 stitches apart.
Rnd 21. (sc 2,dec)x6 (18)
Stuff head as you go.
Rnd 22. (sc 1,dec)x6 (12)
Rnd 23. dec x6 (6)
Fasten off and weave in ends.
You can now sew on your tail to the back of your bunny.
Placement is up to you.
Now is a good time to add your nose. You can make it any shape you’d like.
Hat
Rnd 1. sc 6 in MR (6)
Rnd 2. inc x6 (12)
Rnd 3. (sc 1, inc)x6 (18)
Rnd 4. sc, chain 6, skip 3 sc on the hat and sc 7 back into the hat, chain 6, skip 3 sc on the hat, sc 4 back into the hat.
Rnd 5. (sc 1,inc)x12 (36)
Rnd 6-8. sc around (36) *3 rounds*
Rnd 9. chain 1, (dc 2, dec)x9 (27)
The chain 1 is not counted as a stitch.
Slst into the first dc and fasten off, weave in ends.
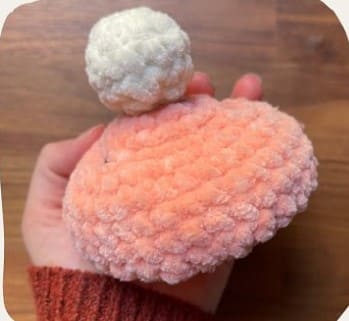
Pom pom
Rnd 1. sc 4 in MR (4)
Rnd 2. inc x8 (8)
Rnd 3. (sc 1,inc)x4 (12)
Rnd 4. sc 12 (12)
Rnd 5. (sc1,dec)x4 (8)
Stuff pom pom.
Rnd 6. dec x4 (4)
Fasten off and leave a tail.
Use the tail from the pom pom to sew on top of the hat.
Ears (make 2)
Rnd 1. sc 8 in MR (8)
Rnd 2. inc x8 (16)
Rnd 3-6. sc around (16) *4 rounds*
Rnd 7. (sc 6,dec)x2 (14)
Rnd 8-10. sc around (14) *3 rounds*
Rnd 11. (sc5,dec)x2 (12)
Rnd 12. (sc4,dec)x2 (10)
Rnd 13. (sc3,dec)x2 (8)
Rnd 14. sc around (8)
Rnd 15. (sc2,dec)x2 (6)
Rnd 16-17. sc around (6) *2 rounds*
Don’t stuff the ears.
sc 3 across the top to close.
Fasten off and leaving tail.
Pro tip:
To help place the ears in the right spot, I suggest putting the hat on your bunny and using stitch markers to see where is best to place your ears on your bunny’s head. Then take off the hat and sew on the ears.
Scarf
Shorter scarf:
Rnd 1. ch 31 (31)
Rnd 2. starting in 2nd ch. from hook sc 30 (30)
Rnd 3. ch 1, turn, sc 30 across (30)
Longer scarf
Rnd 1. ch 41 (41)
Rnd 2. starting in 2nd ch. from hook sc 40 (40)
Rnd 3. ch 1, turn, sc 40 across (40)
How to:
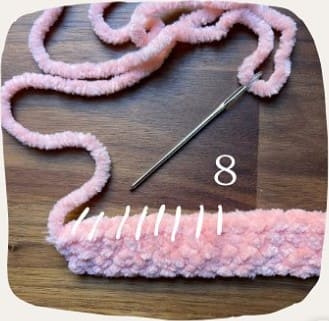
Once you finish your scarf, don’t fasten off.
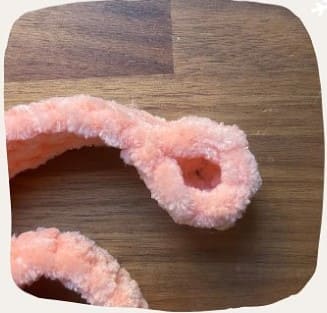
Use the tail and count 8 stitches back, fold the end to that eight stitch & sew the end there to create a loop.
When you wrap your scarf around your bunny, you put an end through the loop and pull, so you don’t have to knot your scarf.
Crochet bunny amigurumi is ready!

admin
Recommended To You