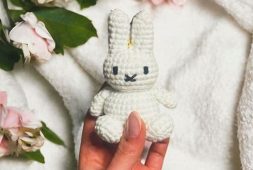
Greetings, I present to you this different looking crochet bunny tutorial pattern. I’ve never seen such a different amigurumi bunny before. I was very excited when I saw this. I wanted to share it with you immediately. Although it may seem a little long to make, it is actually very simple. So I can say that it is an easy crochet bunny pattern. Also, I’m sure your kids will like it too. Besides this cute rabbit, you will also learn how to crochet carrots. If I have to briefly talk about the amigurumi bunny free pattern, its legs, body, head and ears are made as a single whole. You make the arms separately and fix them to the body. You can make it more functional by placing wire on the inside of the bunny’s arms. If you do not prefer it, just adding fiberfill will be enough. Now you can follow how to make this cute amigurumi bunny step by step below.
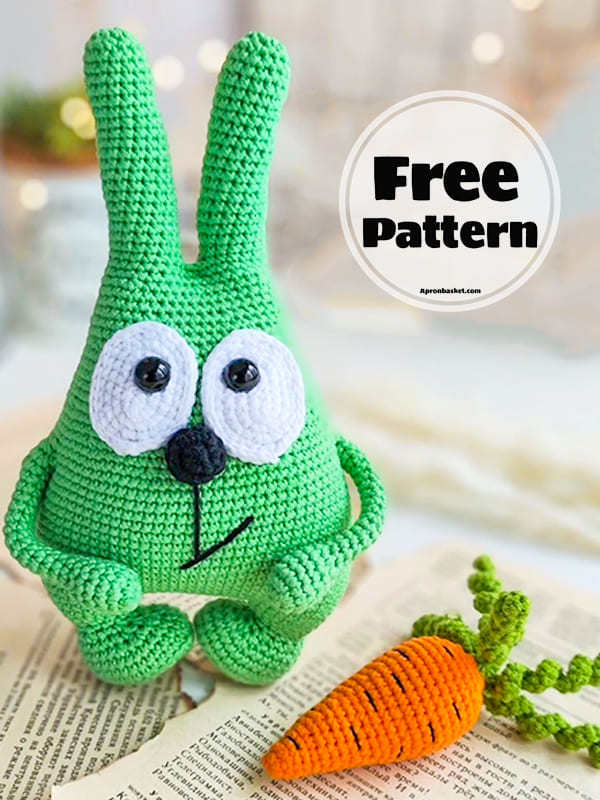
Free Crochet Bunny And Carrot Pattern
Designer: mamavyaz
Materials and tools
Sport weight / 4ply yarn lavita yarn baby cotton (50g/165m) 8110 mint.
Sport weight / 4ply yarn alize cotton gold (100g/330m) 55 white, 60 black, 83 orange, 126 green.
Crochet hook – 1.75 mm or any type you prefer.
Fiberfill.
Safety eyes 10 mm size – 2 pcs.
Wire for the arms (1.8 mm in one addition).
Insulating tape.
Plastic cover or thick cardboard for insoles.
Scissors.
Needle for embroidery and sewing pieces.
Pins for attaching details.
Markers.
The size of finished toy is approx 20 cm.
Abbreviations
MR- Magic ring
Sc- Single crochet
Inc- Increase
Dec- Decrease
Ch- Chain
BLO- Back loop only
Slst- Slip stitch
*6- Number of repeats
(12)- Total number of stitches in a round
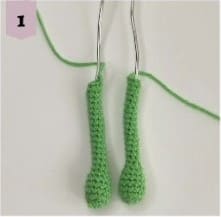
Arms (make 2)
Start crocheting with mint thread. Insert a wire frame if necessary.
1. 6 sc in MR
2. 6 inc (12)
3-6. 12 sc (4 rounds)
7.6 dec (6)
Fill in the arm with fiberfill. Next, do not fill your arm with fiberfill.
8-23. 6 sc (16 rounds)
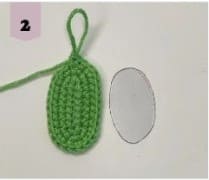
Cut the yarn, fasten off, weave in the ends. (photo 1)
Legs – body – ears
Start crocheting with mint thread. First crochet the left leg, then the right leg. Stuff with fiberfill in the process.
Make chain 9, start to crochet on the second chain from the hook:
1. 7 sc, 3 sc in the last loop on the other side off the chain: 6 sc, inc (18)
2. inc, 6 sc, 3 inc, 6 sc, 2 inc (24)
3. 1 sc, inc, 6 sc, (1 sc, inc)* 3, 6 sc, (1 sc, inc) * 2 (30)
At this stage, you can cut the sole (2 pieces) from a thin plastic or cardboard. (photo 2)
4. BLO: 30 sc
5-6. 30 sc (2 rounds)
Insert the cut sole onto the bottom of the foot.
7. 5 sc, (1 sc, dec)* 6, 7 sc (24)
8. 5sc, 6 dec, 7 sc (18)
9. (1sc,dec)*6 (12)
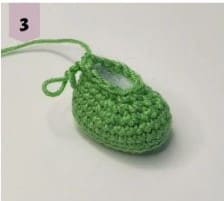
10. 12 sc (photo 3)
11. (1sc,inc)*6 (18)
12. (2sc,inc)*6 (24)
13. 13 sc (short round)- for the left leg, cut the thread and hide.
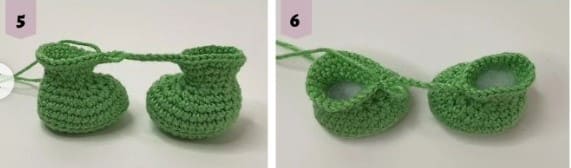
13 sc – for the right leg. Do not cut the thread (photo 4)

Continue crocheting:
Make 9 ch, attach the left legs:(photo 5,6)
14. 24 sc in the left leg, 9 sc on the chain, 24 sc in the right leg, 9 sc on the chain (66)
Place marker.
15. 11 sc, inc, 11 sc, inc, 9 sc, inc, 11 sc, inc, 11 sc, inc, 7 sc, inc (72)
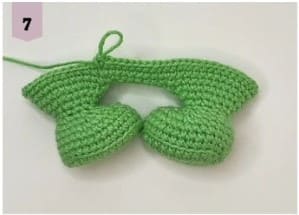
16. (11sc,inc)*6 (78) (photo 7)
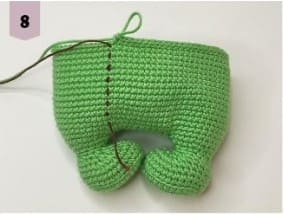
17-30. 78 sc (14 rounds) (photo 8)
Attach the arms:
Be careful when crocheting the arms. Number of sc on the body may differ. Make sure the arms are at the sides and the thumbs point forward.
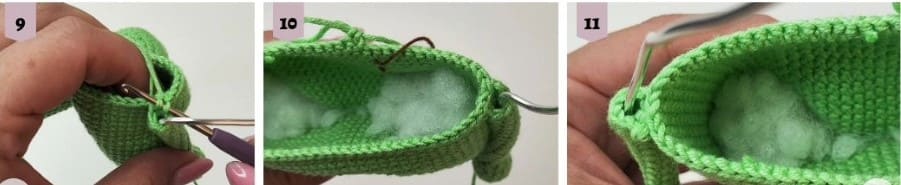
31. 12 sc, 3 sc by crocheting stitches in the inner half of the left arm together with the body, 36 sc, 3 sc in the inner half of the right arm together with the body, 24 sc (78) (photo 9-11).
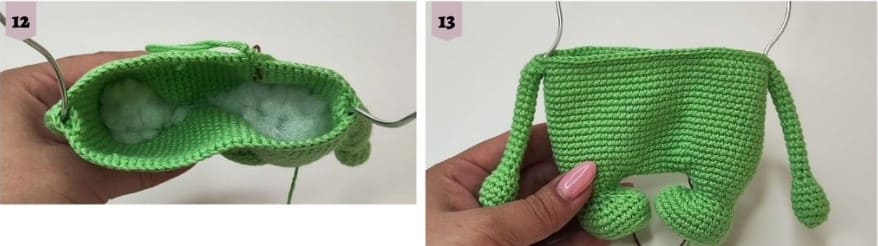
32. 12 sc, 3 sc in the outer half of the left arm, 36 sc, 3 sc in the outer half of the right arm, 24 sc (78) (photo 12,13).
33. (11 sc, dec) 6 (72)
34. 72 sc
35. 5 sc, dec, (10 sc, dec) * 5, 5 sc (66)
36-37. 66 sc (2 rounds)
38. (9 sc, dec) 6 (60)
39-40. 60 sc (2 rounds)
41. 4 sc, dec, (8 sc, dec) * 5, 4 sc (54)
42-43.54 sc (2 rounds)
44. (7 sc, dec) 6 (48)
45-46. 48 sc (2 rounds)
47. 3 sc, dec, (6 sc, dec) * 5, 3 sc (42)
48-49.42 sc (2 rounds)
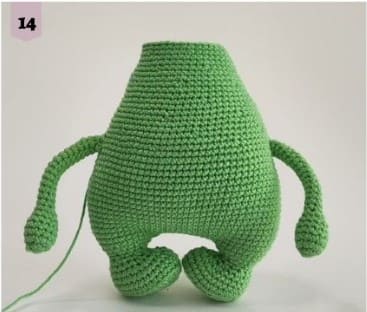
50. (5 sc, dec) 6 (36)
51. 36 sc (photo 14)
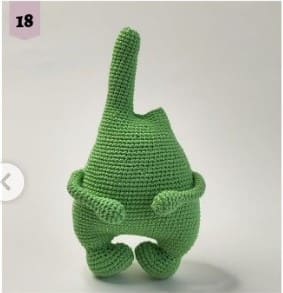
Next we will crochet the ears.
First, crochet the first ear, then the second. Fill with a fibrous filling, as you crochet. 17 sc, connect the two sides crochet 4 sc. Place marker. (photo 15-17)

1-20. 15 sc (20 rounds)
21. (3sc,dec)*3 (12)
22. 6 dec (6)
Fasten off, sew the hole and hide the yarn tail inside the ear. (photo 18)
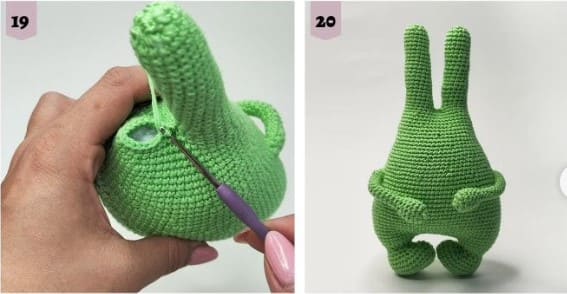
Use mint thread to crochet the second ear. (photo 19,20)
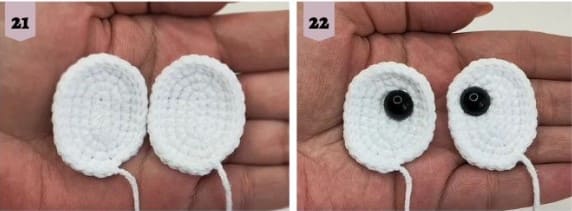
Eyes (make 2)
Start crocheting with white thread.
Make chain 6, start to crochet on the second chain from the hook:
1. 4 sc, 3 sc in the last loop on the other side off the chain: 3 sc, inc (12)
2. inc, 3 sc, 3 inc, 3 sc, 2 inc (18)
3. 1 sc, inc, 3 sc, (1 sc, inc) * 3, 3 sc, (1 sc, inc) * 2 (24)
4. 2 sc, inc, 3 sc, (2 sc, inc)* 3, 3 sc, (2 sc, inc) * 2 (30)
5.30 sc
6. 30 slst
Cut the yarn, fasten off, leaving a long thread for sewing. (photo 21)
Place safety eyes in the white part of the eyes. (photo 22)
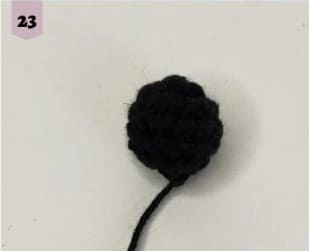
Nose
Start crocheting with black thread. Stuff with fiberfill in the process.
1. 6 sc in MR
2. 6 inc (12)
3-4. 12 sc (2 rounds)
5. 6 dec (6)
Cut the yarn, fasten off, sew the hole and leaving a long thread for sewing. (photo 23)
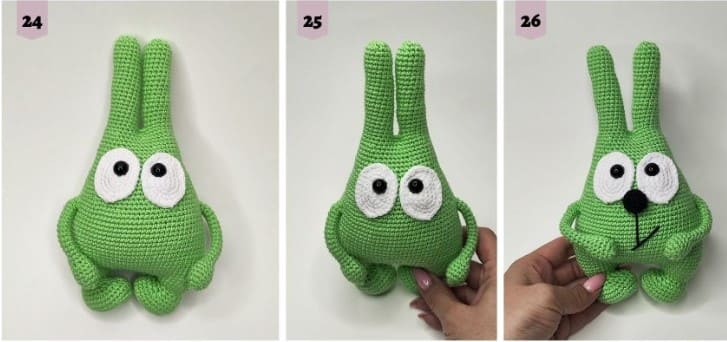
We sew the eyes in any place at your discretion. (photo 24,25)
We sew the nose under the eyes and embroider the mouth. (photo 26)
Carrot
Start crocheting with orange thread. Stuff with fiberfill in the process.
1. 6 sc in MR
2. 6 sc
3. (1sc,inc)*3 (9)
4. 9 sc
5. (2sc,inc)*3 (12)
6. 12 sc
7. (3sc,inc)*3 (15)
8. 15 sc
9. (4sc,inc)*3 (18)
10. 18 sc
11. (5sc,inc)*3 (21)
12. 21 sc
13. (6sc,inc)*3 (24)
14. 24 sc
15. (7sc,inc)*3 (27)
16. 27 sc
17. (8sc,inc)*3 (30)
18-21. 30 sc (4 rounds)
22. (4sc,dec)*5 (25)
23. (3sc,dec)*5 (20)
24. (2sc,dec)*5 (15)
25. (1sc,dec)*5 (10)
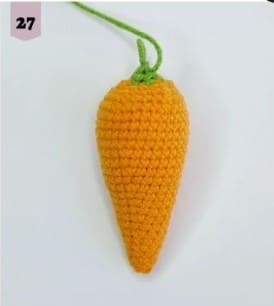
Change color to green.
26. 5 dec (5)
Do not cut the thread. (photo 27)
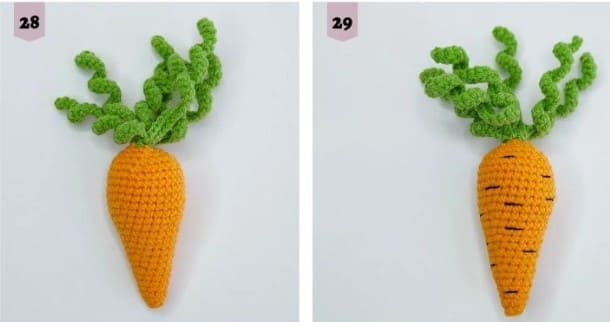
Make chain 31. Start to crochet on the second chain from the hook:
(30 sc, slst in the next stitch on the base)*6
Cut the yarn, fasten off, weave in the ends. (photo 28)
Embroider stripes with black thread. (photo 29)

admin
Recommended To You