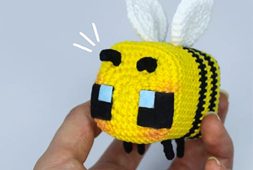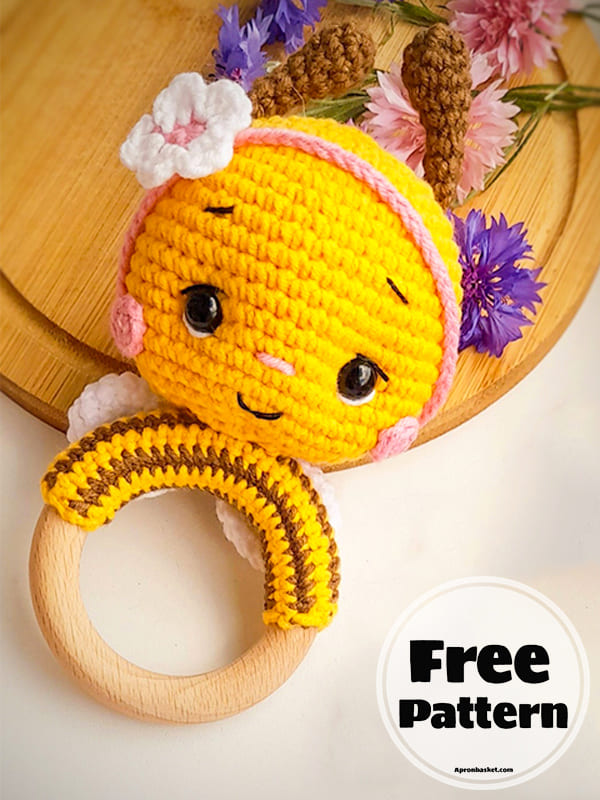
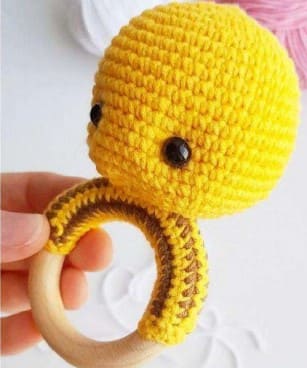
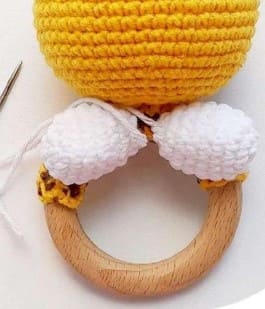
Here is the free crochet bee pattern as well as a crochet baby rattle. The designer used a 2mm crochet hook to make such a small crochet bee. At the same time, in order to make a rattle, you will need a rattle and a wooden ring with a diameter of 50-60 mm. All parts of the crocheted bee are made separately and then you assemble them in the assembly part. The free crochet bee pattern is waiting for you below, with detailed step-by-step instructions and helpful detailed instruction pictures. Since I translated this cute crochet rattle pattern myself, there may be mistakes in some places, do not hesitate to ask where you are stuck. Don’t forget to follow me for more such different crochet rattle and crochet bee patterns. I wish you all a nice week.
Free Crochet Bee Rattle Pattern
Designer: korol.toys
Necessary materials:
1) Hook 1.50 or 2 mm;
2) Yarnart Jeans yarn or other semi-cotton yarn; colors – yellow, brown, pink, white;
3) Black thread for decorating the muzzle;
4) Eyes on a safe mount – 5 or 6 mm;
5) Wooden ring, diameter – 55 or 60 mm;
6) Filler (holofiber);
7) Ringing ball (rattle) – 24 or 28 mm;
8) Long needle for stitching parts and decorating the muzzle, scissors.
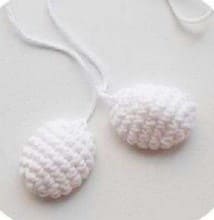
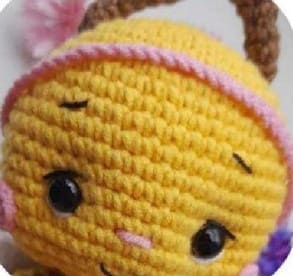
Head:
1) 6 sc in MR (6)
2) 6 inc (12)
З) (1 sc, inc) х 6 (18)
4) (2sc, inc) х 6 (24)
5) (3sc, inc) х 6 (30)
6) (4sc, inc) х 6 (36)
7) (5sc, inc) х 6 (42)
8) (6 sc, inc) х 6 (48)
9-18) 48 sc
19) (6 sc, dec) х 6 (42)
20) (5 sc, dec) х 6 (36)
21) (4 sc, dec) х 6 (30)
22) (3 sc, dec) х 6 (24)
23) (2 sc, dec) х 6 (18)
24) (1 sc, dec) х 6 (12)
– At the level of 14-15 rows, insert and secure the eyes;
– The distance between the eyes is 8 sc.
– Fill the part with holofiber.
– Insert a ringing ball (rattle) in the middle.
– Pull the hole of the part.

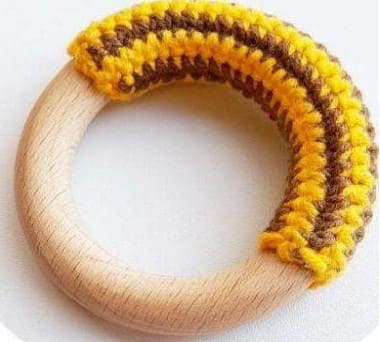
Make on a chain of 30 chain stitches. Next, crochet 10 rows in turning rows, alternating the color of the yarn (brown, yellow).
Attention! The number of rows of binding can be more or less, depending on the diameter of your ring and the density of knitting. The diameter of my ring is 60.
Wings:
Make 2.
1) 6 sc in MR (6)
2) 6 inc (12)
3) (1 sc,1 inc) х 3 (15)
4-7) 15 sc
8) (3 sc, dec) х 2 (13)
9) (2 sc, dec) х 2 (11)
10) (1 sc, dec) х 3 (8)
Sew the walls of the last row.
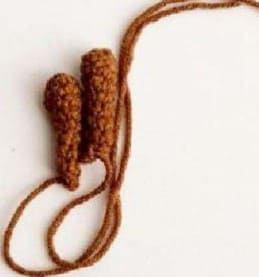
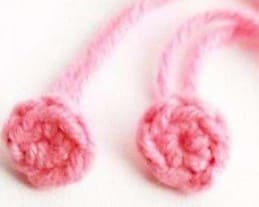
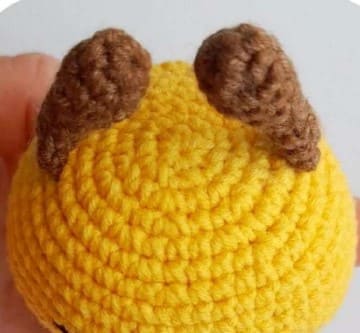
Antennas:
Make 2.
1) 6 sc in MR (6)
2) (1 sc, inc) х 3 (9)
3) 9 sc
4) (1 sc, dec) х 3 (6)
5-8) 6 sc
There is no need to fill the antenna. Fold the piece in half; knit the last row on both walls; leave the thread for sewing.
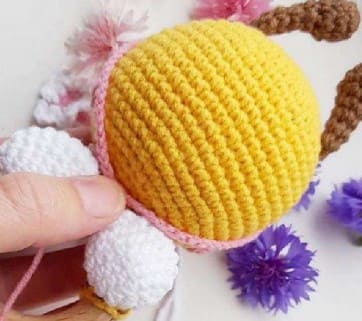
Cheeks:
Make 6 sc in MR, make a connecting column (slst).
Leave the thread for sewing.
Headband:
Make on a chain of 70 chain stitches.
Attention!
Your number of loops may be different (more or less), depending on the volume of your head.
The decoration for the headband can be anything (roses, bows).
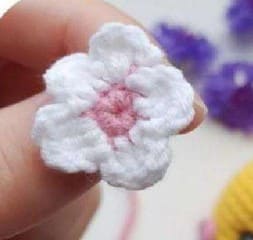
Middle:
1) 5 sc in MR;
Next we crochet 5 petals:
2) 2 ch, inc and dc, 2 ch, slst in one loop (5).
Assembly and design of the rattle
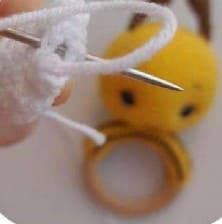
– Sew the head of the rattle to the harness on the ring;
– Then tighten the eyes with a thread of the same color as the main part.
– At the very bottom of the head, in the middle (about row 20), insert a needle and thread;
– Bring the needle to the inner corner of the eye, then to the other inner corner of the eye;
– The thread should be at the bottom of the eye;
– Then, from the inner corner of the eye, pull the needle into the lower part of the head, in the row and column from which the thread was originally drawn;
– Next we also draw the thread to the second eye;
– Return the thread to the lower part of the head;
– You should have two threads in one column.
– Then fix the tension:
– Pull two threads;
– The threads should fall behind the eyes;
– The eyes themselves should sink into the canvas;
– Tie the two threads tightly;
– Hide the ends of the threads inside your head.
Sew the antennae to the head:
– Count 5 sc from the amigurumi ring and sew on the tendril.
– The distance between the antennae is 10 sc.
– Try to sew the antennae at an angle.
Sew the wings to the harness.
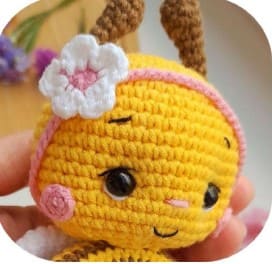
Sew on the headband:
– Fix the headband on your head;
– The rim should fit snugly to the rattle;
– Connect and sew the ends of the headband at the bottom;
– Sew the headband to the bottom of the head, on the sides and in the place where the flower is located;
– Then sew a flower to the headband.
Design the face as in the photo:
– Using black thread, embroider eyebrows, eyelashes, mouth;
– Embroider whites with white thread;
– Embroider the nose;
– Sew on the cheeks.

admin
Recommended To You