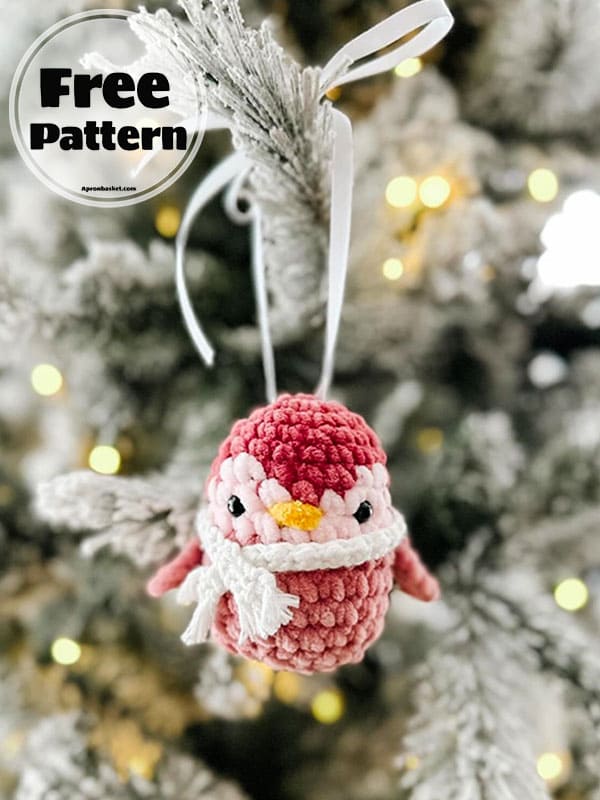
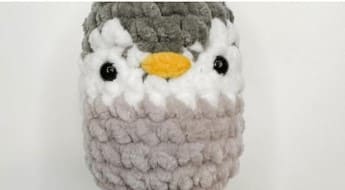
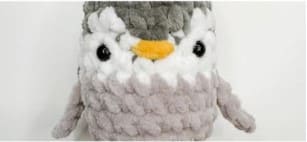
There are only a few days left until christmas. We can say that the countdown has almost begun. Lastly, I take care to share crochet christmas ornaments with you. I don’t know if there is anyone among us who hasn’t decorated the Christmas tree yet, but it’s still nice to share. The crochet penguin christmas ornament is available today, completely free of charge. I would like to thank our designer for sharing such a premium crochet christmas ornament pattern with us for free. He did a great job. I love crochet penguin amigurumi toys and having this on the Christmas tree makes me even more excited. Now let’s embroider this cute penguin pattern step by step. See you for more free amigurumi pattern instructions.
Penguin Crochet Pattern
Pattern: doubledutchcrochetco
Materials and tools
– Yarn:
– Colour A: 30g bulky size 6 velvet yarn (I used baby snuggle in dusty rose)
– Colour B: 20g bulky size 6 velvet yarn (I used baby snuggle in soft pink)
– Colour C: 30g bulky size 6 velvet yarn (I used baby snuggle in powder pink)
– Colour D: 1g bulky size 6 velvet yarn (I used baby snuggle in sunshine)
– Colour E: 2g medium size 4 in white.
– Hooks:
– 5.5 mm hook.
– 3.75 mm hook.
– Darning needle
– Scissors
– Fabric pins
– Stitch marker
– Fiber fill
– Ribbon
– 10 mm safety eyes
Finished size:
H: 4″
W: 3.5″
Abbreviations
Rnd- Round
MR- Magic ring
Sc- Single crochet
Ch- Chain
Slst- Slip stitch
Inc- Increase
Dec- Decrease
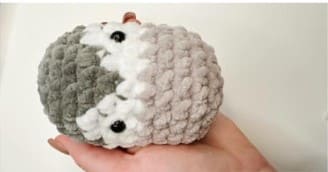
Body and hat
5.5 mm hook, bulky yarn.
Colour A yarn.
Rnd 1. MR, sc 8 (8)
Rnd 2. [inc]*8 (16)
Rnd 3. [sc3,inc]*4 (20)
Rnd 4-5. sc 20 (2 rounds) (20)
Rnd 6. [B] sc 2, [A], sc 3, [B], sc 2, [A], sc 12 [B], sc 1 (20)
Rnd 7. [B] sc 3, [A], sc 1, [B], sc 4, [A], sc 11 [B], sc 1 (20)
Rnd 8. [B] sc 8, [A], sc 11, [C] sc 1 (20)
Colour C yarn.
Rnd 9-12. sc 20 (4 rounds) (20)
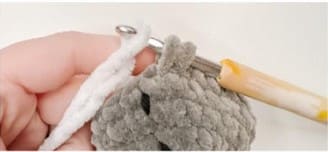
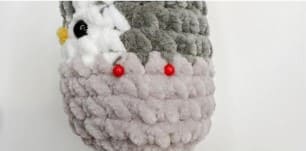
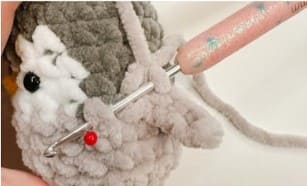
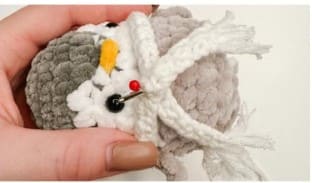
Place eyes and nose.
Rnd 13. [sc 3,dec]*4 (16)
Start stuffing.
Rnd 14. [dec]*8 (8)
Slst and tie off. Gather the remaining 8 stitches and pull tight, weave in ends.
1. To change the colour, end the last stitch of the previous row or stitch with the new colour. Continue this for all colour changes.
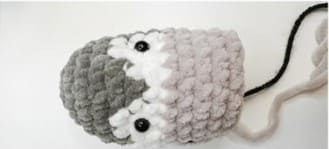
2. Place eyes on round 7 & 8 with 4-5 stitches in between, centered in the colour B space.
3. Stuff with fiber fill.
Beak
Darning needle, bulky yarn.
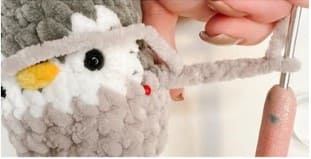
1. Using your darning needle and colour D yarn, insert the needle into the top of round 8, centered between the eyes approx one stitch from each eye.
2. Go back around for a total of 3 times.
3. Beak finished. Tie off and weave in ends.
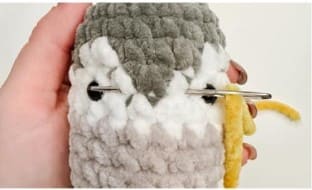
Fins (X2)
3.75 mm hook, bulky yarn.
Colour C yarn.
Slst to the side of the body (4) on round 9, chain 5.
Skip the first ch, place one (3) sc in each of the remaining 4 chains.
Slst to next stitch.
Do not stuff.
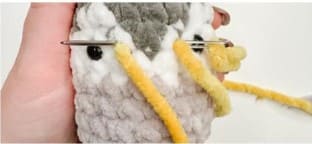
1. Using fabric pins, mark where you want your fin.
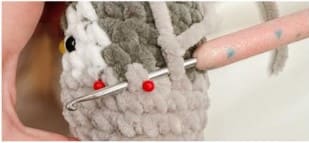
2. Make a slip knot and using the 3.75 mm hook, insert it into one stitch directly into the body.
3. Chain 5.
4. Skip the first chain. Make one sc in the remaining 4 chains. Make a slip stitch to the next stitch to secure.
5. Repeat on both sides. Once complete, tie off and weave in yarn ends.
Scarf
3.75 mm hook, medium weight yarn.
Colour E yarn.
Row 1. Slip knot, ch 65 (65)
Row 2. Skip the first chain, [hdc, slst]*32 (64)
Slst and tie off.
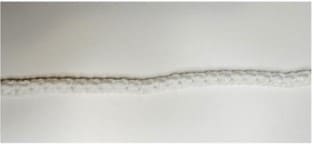
1. Complete row 1 & 2. If 65 chains is too long, adjust the amount of chains with a different odd number.
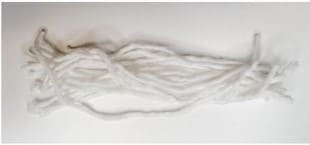
2. Wrap yarn around your hand cut to create strands of yarn for the tassels on the edge of the scarf.
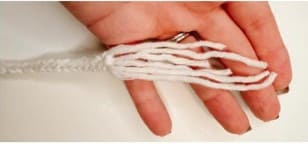
3. Attach 2-3 strands of yarn to the end of the scarf to create the tassels.

4. Cut to desired length and separate strands of yarn as desired.
5. Wrap scarf around round 9 of the body and pin it with a fabric pin. Sew scarf onto the body with a darning needle.
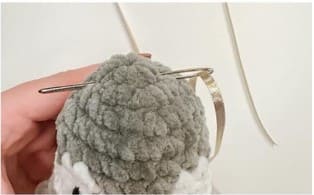
6. Using a darning needle, attach ribbon to the very top of the head. Tie a bow.

admin
Recommended To You