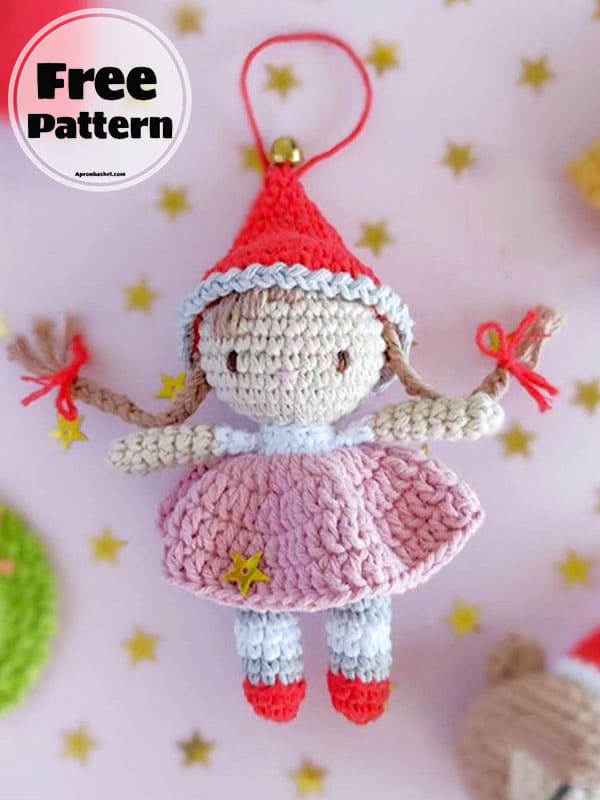
Hi, continue reading this article to make a cute little crochet elf keychain. I leave here for you the best crochet keychain pattern to be made at Christmas time, free of charge. I really liked such cute crochet doll patterns. Turning this into a keychain is a great idea. If you haven’t found a gift for your loved ones yet at Christmas time, how about making it with your own hands? You can start making this cute elf crochet keychain by downloading the free PDF file right now. Merry christmas!
Elf Crochet Keychain Pattern
Pattern: ohana.handmadefriends
Materials needed
100% cotton yarn
Hook size 2 mm (2.5 mm hook for the hat)
sleigh bells
Soft toy filling
Yarn needle
Stitch markers
Pins
Finished size: Approximately 16 cm.
Abbreviations
MR- Magic ring
Slst- Slip stitch
Sc- Single crochet
Ch- Chain
BLO- Back loop only
FLO- Front loop only
Inc- Increase
Dec- Decrease
Dc- Double crochet
F/O- Fasten off
Legs
Leg one
Start with red.
1. 5 sc in MR (5)
2. 5 inc (10)
3. 10 sc (10)
Change to grey.
4. BLO 10 sc (10)
5. 10 sc
Change to white.
6-7. 10 sc (10)
Change to grey.
8-9. 10 sc (10)
Change to white.
10-11. 10 sc (10)
F/O and weave in.
Leg two
Repeat “leg one” instructions and in round 11 crochet 2 sc more so the color changes sit at the back of the legs, ch 2 and make 1 sc into the first leg to join and continue with the body.
Stuff as you go.
Body
12. sc in the next 9 stitches, 2 sc into the ch2, 10 sc around the second leg, 2 sc into the ch 2 (24)
13-15. 24 sc (24)
16. (2sc,dec)x6 (18)
17. 18 sc (18)
Change to light pink.
18. 18 sc (18)
Change to white.
19. BLO 18 sc (18)
20. (1sc,dec)x6 (12)
Before continuing with the head we are going to make the dress!
Dress
1. Holding our work upside down, attach the light pink to the first FL of round 19 and ch 3.
Then make dc inc in each stitch around, slst into the ch 3 space. (36)
2. ch 3, (1 dc, dc inc) repeat the sequence all around, slst into the ch 3 space (52)
3-4. 52 dc, join with slst, fasten off and weave in (52)
Now we continue with the head.
Head
Change to skin color.
21. BLO 12 sc (12)
22. 12 inc (24)
23. (1sc,inc)x12 (36)
24-29. 36 sc [6 rounds] (36)
30. (4sc,dec)x6 (30)
31. (3sc,dec)x6 (24)
32. (2sc,dec)x6 (18)
33. (1sc,dec)x6 (12)
34. 6 dec (6)
Close the opening with the yarn needle and weave in.
Arms
Start with skin color.
1. 6 sc in MR (6)
2-7. 6 sc (6)
Change to white.
8. 6 sc (6)
9. 2 sc, flatten the opening and make 3 sc through both layers to close.
Fasten off and leave a long tail for attaching.
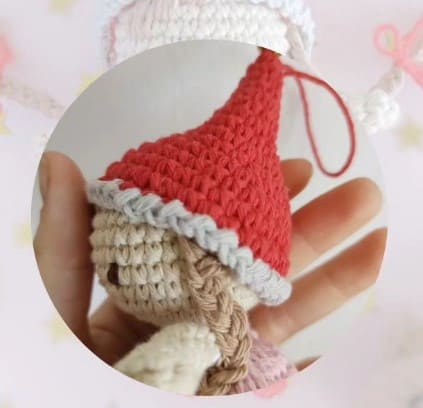
Hat
With 2.5 mm hook.
Start with red.
1. 5 sc in MR (5)
2. 5 sc (5)
3. 5 inc (10)
4. 10 sc (10)
5. (1sc,inc)x5 (15)
6. 15 sc (15)
7. (2sc,inc)x5 (20)
8. 20 sc (20)
9. (3sc,inc)x5 (25)
10. 25 sc (25)
11. (4sc,inc)x5 (30)
12. (5sc,inc)x5 (35)
13-14. 35 sc, leave a long tail for attaching (35)
Change to grey.
15. FLO (slst, ch 1) repeat the sequence all around, fasten off.
Before sewing the hat to the head, embroider the bangs.
To make the braids use the back loops available from the last round of the hat, use 3 loops on each side, attach a double thread of yarn on each one.

admin
Recommended To You